
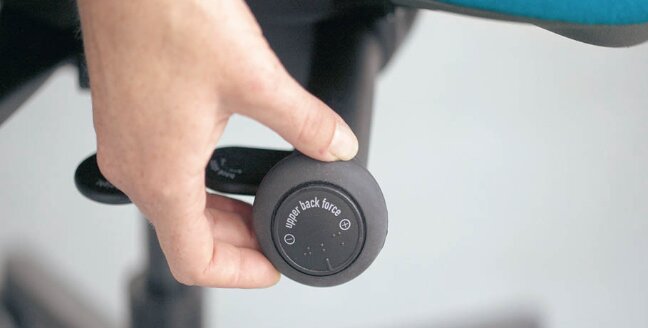
Properly adjusting an ergonomic office chair can significantly improve posture, reduce back and neck strain, and increase comfort during long work sessions. However, most users never set their chair correctly, leaving key features unused or misconfigured.
This guide explains exactly how to adjust an ergonomic office chair step by step, covering every major control and how to tailor it to your body type and workspace.
Why Proper Ergonomic Office Chair Adjustment Matters
An ergonomic chair is designed to support the natural curve of the spine and reduce pressure on joints while sitting for extended periods. But that support only works when the chair is correctly adjusted.
When a chair is poorly set up, common issues include:
- Lower back pain from lack of lumbar support alignment
- Shoulder tension from incorrect armrest height
- Neck strain from poor monitor positioning and headrest mismatch
- Circulation issues from improper seat depth
- Fatigue from incorrect tilt and recline balance
A properly adjusted ergonomic chair helps maintain a neutral posture where:
- Feet stay flat on the floor
- Knees sit at roughly 90 degrees
- Hips are slightly above or level with knees
- Spine maintains its natural S-curve
Even high-end chairs will feel uncomfortable if these fundamentals are ignored.
Understanding the Key Parts of an Ergonomic Chair
Before learning how to adjust an ergonomic chair, it helps to understand the main components involved in the setup.
Seat Height Adjustment Lever
Controls how high or low the chair sits relative to the floor. This is the foundation of all other adjustments.
Seat Depth Mechanism
Moves the seat forward or backward to support thigh length and prevent pressure behind the knees.
Lumbar Support System
Adjusts the height and depth of lower back support to maintain spinal alignment.
Armrest Controls
Usually adjustable in height, width, depth, and angle depending on chair quality.
Tilt and Recline Mechanism
Controls how far the chair leans backward and how resistance is applied.
Tilt Tension Knob
Adjusts how much force is required to recline.
Headrest (if available)
Supports the neck and upper spine during reclined positions.
Each of these components works together. Adjusting one incorrectly can affect the rest.
Step-by-Step Guide: How to Adjust an Ergonomic Chair
This section walks through the correct order of adjustments. Following the sequence matters because each setting affects the next.
Adjust Seat Height First
Seat height is the foundation of ergonomic setup.
Correct Seat Height Position
To set proper height:
- Sit with feet flat on the floor
- Keep knees at a 90–100 degree angle
- Thighs should be parallel to the ground
- Hips should be slightly higher than or level with knees
How to Adjust
Most ergonomic chairs use a right-side gas lift lever:
- Sit in the chair
- Pull the lever up to lower or release pressure
- Stand slightly to raise the seat or sit to lower it
- Stop when your feet are flat and posture feels neutral
Common Mistakes
- Sitting too high, causing dangling feet
- Sitting too low, compressing hips and knees
- Adjusting height after other settings (always do this first)
Set Seat Depth for Proper Thigh Support
Seat depth determines how much of your thighs are supported.
Ideal Seat Depth Position
A correct setup should:
- Leave 2–3 inches between the seat edge and back of your knees
- Fully support thighs without pressure at the knee crease
- Allow comfortable upright sitting without sliding forward
How to Adjust Seat Depth
Depending on the chair:
- Slide seat forward/back using a side lever
- Or adjust via a sliding seat plate under the cushion
Why It Matters
Incorrect depth can cause:
- Knee pressure and reduced circulation
- Slouching if seat is too deep
- Lack of support if seat is too shallow
Adjust Lumbar Support for Spine Alignment
Lumbar support is one of the most important ergonomic features.
Proper Lumbar Position
The lumbar pad should:
- Sit in the natural curve of your lower back
- Support the inward curve above the hips
- Not push too aggressively or sit too low
How to Adjust Lumbar Support
Most chairs allow:
- Height adjustment (move up/down along backrest)
- Depth adjustment (increase or decrease pressure)
Step-by-Step Setup
- Sit fully back in the chair
- Locate the natural curve in your lower spine
- Raise or lower lumbar support until it fits snugly
- Adjust depth so it supports without forcing posture
Common Mistakes
- Setting lumbar too low (supports hips instead of spine)
- Over-tightening lumbar pressure (causes discomfort)
- Ignoring lumbar entirely during setup
Adjust Armrests for Shoulder and Wrist Comfort
Armrests reduce shoulder strain when correctly positioned.
Ideal Armrest Position
- Elbows should rest at 90–100 degrees
- Shoulders should stay relaxed, not elevated
- Forearms should be parallel to the desk surface
How to Adjust Armrests
Depending on model:
- Height: raise or lower arm pads
- Width: move inward or outward
- Depth: slide forward/back
- Angle: rotate inward/outward
Proper Setup Method
- Sit upright with shoulders relaxed
- Bring armrests to meet elbows naturally
- Adjust height so shoulders are not lifted
- Ensure arms don’t force inward or outward strain
Common Mistakes
- Armrests too high (shoulder shrugging)
- Armrests too low (no support)
- Using armrests while typing incorrectly aligned with desk height
Adjust Tilt and Recline for Movement Support
Tilt controls how the chair responds to body movement.
Why Tilt Matters
A good tilt mechanism:
- Encourages micro-movements
- Reduces spinal compression
- Supports dynamic sitting instead of rigid posture
Ideal Recline Range
- Upright: 90–100 degrees for focused work
- Medium recline: 100–120 degrees for relaxed sitting
- Deep recline: 120–135 degrees for breaks
How to Adjust Tilt
Most chairs include:
- Tilt lock lever (locks or unlocks recline)
- Recline angle control
Setup Steps
- Start in upright locked position
- Gradually unlock tilt
- Lean back slightly and test resistance
- Lock at preferred working angle
Adjust Tilt Tension for Body Weight
Tilt tension controls how easily the chair reclines.
Correct Tension Setting
- Too loose: chair leans back too easily
- Too tight: recline feels stiff or impossible
How to Adjust
- Locate tension knob under seat
- Turn clockwise to increase resistance
- Turn counterclockwise to decrease resistance
- Test recline after each adjustment
Best Practice
Set tension so:
- You can recline smoothly without effort
- The chair supports you without pushing you backward
Adjust Headrest for Neck Support (If Available)
Headrests are often misused or ignored entirely.
Proper Headrest Position
- Supports base or middle of the skull
- Keeps neck aligned, not pushed forward
- Used mainly during recline, not upright typing
How to Adjust
- Move height to align with head
- Adjust angle to match natural neck curve
Common Mistakes
- Using headrest while leaning forward (causes strain)
- Positioning too low on neck instead of skull
- Relying on headrest for upright posture
Full Ergonomic Chair Setup by Body Type
Different body types require slight adjustments.
Taller Users
- Increase seat depth
- Raise lumbar support slightly higher
- Ensure headrest aligns properly
- Check armrest height carefully
Shorter Users
- Reduce seat depth
- Lower seat height so feet stay flat
- Lower lumbar support position
- Ensure armrests do not force shoulders upward
Heavier Users
- Increase tilt tension
- Ensure strong lumbar support depth
- Check seat cushion support
Long Sitting Sessions (8+ hours)
- Use slight recline (100–110 degrees)
- Enable dynamic tilt if available
- Prioritize lumbar comfort over rigid posture
Common Mistakes When Adjusting an Ergonomic Chair
Adjusting in the Wrong Order
Always set:
- Seat height
- Seat depth
- Lumbar support
- Armrests
- Tilt and tension
- Headrest last
Ignoring Desk Height
Chair adjustment must match desk height or posture will break down.
Sitting Too Upright All Day
Static posture increases fatigue. Slight recline is healthier.
Overusing Armrests
Armrests should support, not carry full typing weight.
Troubleshooting Common Ergonomic Chair Problems
Lower Back Pain
- Lumbar misaligned
- Seat depth incorrect
- Slouching forward
Neck Strain
- Monitor height incorrect
- Headrest misaligned
- Forward head posture
Shoulder Fatigue
- Armrests too high or low
- Desk mismatch
Leg Discomfort
- Seat height incorrect
- Pressure behind knees from depth issue
Maintenance Tips for Long-Term Comfort
Monthly Checks
- Re-test settings
- Tighten loose components
- Check gas lift stability
Cleaning
- Wipe surfaces regularly
- Clean adjustment mechanisms
- Remove debris from wheels
When to Re-Adjust
- Desk changes
- Body weight changes
- New discomfort patterns
Frequently Asked Questions
How often should I adjust an ergonomic chair?
Usually only initially, then minor tweaks every few months or when discomfort appears.
What is the most important adjustment?
Seat height and lumbar support.
Should I sit upright all day?
No. A slight recline with movement is healthier.
Why is my ergonomic chair still uncomfortable?
Incorrect setup order or mismatched desk height is usually the cause.
Final Thoughts on How to Adjust an Ergonomic Chair
Learning how to adjust an ergonomic chair correctly matters more than the chair model itself. A properly configured mid-range chair can outperform an expensive chair that is poorly set up.
The key is a structured setup: start with height, build spinal alignment, then fine-tune support points. Once dialed in, the chair should support posture without constant effort or awareness.