
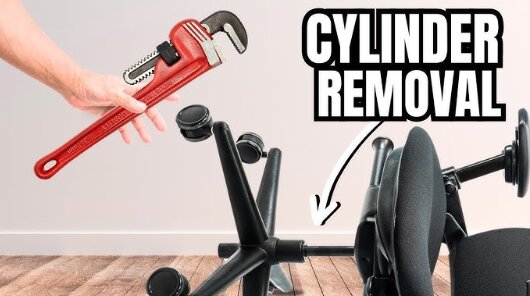
The office chair cylinder is the core component that controls height adjustment and supports your full body weight. When it fails, the chair usually sinks, becomes stuck at one height, or wobbles uncomfortably. The good news is that replacing a gas lift cylinder is a straightforward repair that can extend the life of your chair significantly.
This guide explains exactly how to replace an office chair cylinder, including tools, removal methods, installation steps, troubleshooting, and common mistakes to avoid.
What Is an Office Chair Cylinder?
An office chair cylinder (also called a gas lift, pneumatic lift, or gas spring) is the metal tube located between the chair base and the seat mechanism. It uses compressed nitrogen gas to allow smooth height adjustment.
Main functions:
- Adjusts chair height
- Supports dynamic body weight
- Provides controlled movement up and down
- Maintains stability while seated
When it fails, the chair becomes unusable for ergonomic work.
Signs Your Office Chair Cylinder Needs Replacement
Before replacing the cylinder, confirm that it is actually the problem. Many users mistake base or tilt issues for cylinder failure.
Common symptoms:
1. Chair slowly sinks on its own
You raise the chair, sit down, and it gradually lowers without pressing the lever.
2. Chair won’t stay at height
Even after adjustment, the seat slips down within minutes or seconds.
3. Chair is stuck and won’t move
The height adjustment lever does nothing.
4. Visible wobbling or instability
Excess movement between the seat and base connection point.
5. Air or oil leakage (rare but possible)
Some cylinders may show signs of wear or residue near the shaft.
If these issues appear consistently, replacing the cylinder is the correct fix.
Tools You Need to Replace an Office Chair Cylinder
Most replacements require basic household tools. Some chairs may require extra force depending on how long the cylinder has been installed.
Essential tools:
- Rubber mallet (preferred over metal hammer)
- Adjustable wrench or pipe wrench
- Flathead screwdriver
- Penetrating oil (WD-40 or similar)
- Gloves (recommended for grip and safety)
- Cloth or towel (to protect chair parts)
Optional but helpful:
- Vice grips
- Pipe clamp
- Old rug or cardboard (to protect flooring)
Understanding Cylinder Types
Before replacement, you need to identify the correct cylinder type.
Standard sizes:
- Short (100 mm stroke)
- Medium (120–140 mm stroke)
- Tall (200 mm+ for drafting chairs)
Tapered vs straight fit:
- Tapered cylinders: Common in most office chairs
- Straight cylinders: Found in some heavy-duty models
Compatibility tip:
Most office chairs use a standard “universal tapered gas lift cylinder,” but always match:
- Length
- Diameter
- Weight rating
Step-by-Step: How to Replace an Office Chair Cylinder
There are two main parts of the process:
- Removing the old cylinder
- Installing the new one
Step 1: Remove the Chair Base
Turn the chair upside down so the base is accessible.
Instructions:
- Lay the chair on its side or upside down on a soft surface.
- Grip the wheelbase firmly.
- Pull it away from the cylinder stem.
If it is stuck:
- Spray penetrating oil at the joint
- Wait 10–15 minutes
- Tap the base connection gently with a rubber mallet
- Wiggle while pulling upward
If the base does not come off easily, it is likely rusted or tightly wedged due to long-term pressure.
Step 2: Separate the Cylinder from the Chair Mechanism
After removing the base, focus on the top connection (seat plate).
Methods to remove the cylinder:
Method A: Rubber mallet (most common)
- Hold the chair frame steady
- Strike the side of the cylinder near the top joint
- Rotate and repeat around the cylinder
- The cylinder should loosen gradually
Method B: Pipe wrench method
- Clamp the cylinder tightly with a pipe wrench
- Twist left and right to break the seal
- Apply upward force while twisting
Method C: Penetrating oil + impact
- Spray oil at the joint between cylinder and seat mechanism
- Wait 15–30 minutes
- Tap around the joint with mallet
Important note:
Do NOT hit the gas chamber directly with excessive force. The goal is to loosen the friction fit, not damage the mechanism.
Step 3: Remove the Old Cylinder Completely
Once loosened:
- Pull the cylinder straight out
- Clean any debris, rust, or grease from the socket area
- Inspect the seat mechanism for cracks or wear
If the metal sleeve inside the chair base is damaged, it may also need replacement.
Step 4: Install the New Cylinder
Now that the old unit is removed, installation is simple.
Instructions:
- Insert the wider end of the cylinder into the chair base socket
- Press firmly until it sits flush
- Attach the chair seat mechanism onto the top of the cylinder
- Apply downward pressure to secure the fit
Tip:
Do not use excessive force initially. The weight of the chair usually helps lock everything into place.
Step 5: Test the Chair Function
After installation:
Check the following:
- Height adjustment lever works smoothly
- Chair stays at set height
- No wobbling at connection points
- Rotation is smooth
Sit and test under normal weight for a few minutes.
Common Problems After Replacement (And Fixes)
Even after replacing the cylinder, issues can still occur if installation is not perfect.
Problem 1: Chair still sinks
Causes:
- Incorrect cylinder size
- Faulty new cylinder (rare but possible)
- Poor installation fit
Fix:
Recheck compatibility and ensure full insertion into both sockets.
Problem 2: Cylinder feels loose or wobbly
Causes:
- Socket wear in base or seat mechanism
- Incorrect diameter
Fix:
- Add rubber sleeve adapter
- Replace worn base or seat plate if needed
Problem 3: Chair won’t go up or down
Causes:
- Lever mechanism disconnected
- Internal cylinder defect
- Obstruction in seat plate
Fix:
- Check cable/lever connection
- Replace cylinder if defective
- Ensure clean installation area
Problem 4: Cylinder stuck during removal
Causes:
- Rust buildup
- Long-term pressure locking components
Fix:
- Use penetrating oil and patience
- Apply controlled impact around the joint
- Avoid over-hammering (can damage base)
How to Choose a Replacement Office Chair Cylinder
Choosing the right cylinder matters as much as installation.
1. Check height range
Make sure it matches your desk ergonomics:
- Standard desk: 16–21 inches seat height
- Standing desk hybrid: 20–28 inches
2. Weight rating
Common categories:
- Standard (up to 250 lbs)
- Heavy-duty (250–400 lbs)
- Extra heavy-duty (400+ lbs)
3. Stroke length
This controls how much the chair can move up/down.
4. Build quality
Look for:
- Steel casing
- Smooth pneumatic action
- Reinforced seals
Avoid ultra-cheap cylinders that fail within months.
Maintenance Tips to Extend Cylinder Life
A new cylinder can last years if properly maintained.
Best practices:
- Avoid repeatedly slamming chair up/down
- Keep base clean from dust and debris
- Do not exceed weight rating
- Use chair on flat, even flooring
- Rotate usage pressure (don’t always sit in same posture)
Safety Considerations
Although replacement is safe, gas cylinders are pressurized components.
Safety rules:
- Never attempt to open or puncture the cylinder
- Avoid direct hammering on the gas chamber body
- Wear gloves during removal
- Keep face away from strike zone during loosening
If a cylinder leaks gas, dispose of it properly according to local waste guidelines.
When You Should Replace the Entire Chair Instead
In some cases, replacing only the cylinder is not enough.
Consider a full chair replacement if:
- Base is cracked or unstable
- Seat mechanism is damaged
- Multiple components are failing
- Repair cost exceeds replacement cost
If only the cylinder is faulty, replacement is absolutely worth it and cost-effective.
FAQ: Office Chair Cylinder Replacement
How long does it take to replace a cylinder?
Usually 15–40 minutes depending on how stuck the old cylinder is.
Are office chair cylinders universal?
Most are standardized tapered designs, but length and diameter still matter.
Can I fix a sinking chair without replacing the cylinder?
Temporary fixes exist, but they are unreliable. Replacement is the only long-term solution.
Why is my new cylinder still sinking?
Most likely incorrect compatibility or defective unit.
Do I need special tools?
No. Basic tools like a rubber mallet and wrench are usually enough.
Final Thoughts
Replacing an office chair cylinder is one of the most effective repairs for restoring comfort, posture support, and daily productivity. While stuck cylinders can be frustrating, the process is mechanical and predictable once the correct removal method is applied.
A properly installed replacement restores full height control and can significantly extend the lifespan of your chair without needing a full replacement.